
If you know where that quote is from you now realize that I have a not-so-secret obsession with Friends. My friend Maggie remembered it for me, she is quite the Friends aficionado. To be honest this jam making sesh has not been to get over a man but to try to stem the ever present flow of fruit into our house. We have pears, plums, peaches, apples, and walnuts all over the place. If anyone else has an overabundant garden you know how it goes: first you're excited and go out and spend your days eating fruits and vegetables off the plants and trees, then you start to get a little bit sick of them but you're still making fruit pies and zucchini bread, then you grow completely desperate and start doorbell ditching people with bags of squash, then you give up and start throwing all of the rotted fruit you have in the compost bin. This is where canning comes in. While you may not want to spend 4 hours of your day up to your elbows in cooking fruit, you save so much of the bounty for later on in the year. It's good for the environment because you stop the waste and have fruits and vegetables preserved for the winter so that you don't have to buy tropical fruits from South America. Plus, there is no better present than a bottle of home made jam, trust me. Sooo, canning 101. This is it!

Once you finish reading that you may be a bit overwhelmed, but I promise you, you should try it! It really is easy. And you will feel like the ultimate domestic goddess (or god!).
Supplies:
- A VERY large pot. You need something that is large enough so that the jam doesn't boil over. I think something that is about 8 times the size of whatever fruit you have in it is a good rule of thumb. A good place to find these? Thrift stores! Something copper is the best, although cast iron works well too. I'm pretty sure the one I use is aluminum. Don't use a non-stick pan because you will ruin it.
-A large wooden spoon.
-Ladle
-Canning jars. They are always available at hardware stores. 8 oz jars are a good size.
-Scales (again, if you don't have them they are often easy to find at thrift stores).
-Cutting board and good knife.
-Candy thermometer (optional)
For the Jam:
-Fruit
-Sugar
-Lemon, depending what fruit you're using.
Instructions:
Open all of your jars, separating the rings from the lids. Wash everything in very warm water, dry off, and try to keep it warm-ish. Very cold jars can crack when they come into contact with the hot jam.
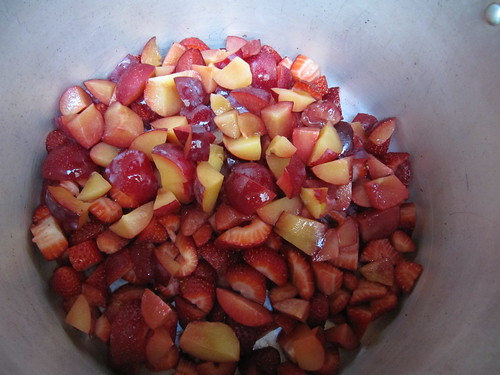
Take your fruit (this time I used plums and strawberries), and cut up everything that you want to use into pieces about the size of a quarter, removing the pits. Weigh the fruit. I like to make sure that I am using an even number just to make weighing everything easier. For example, this time I used 1.5lb strawberries and 1.5lb plums, to make 3 pounds.
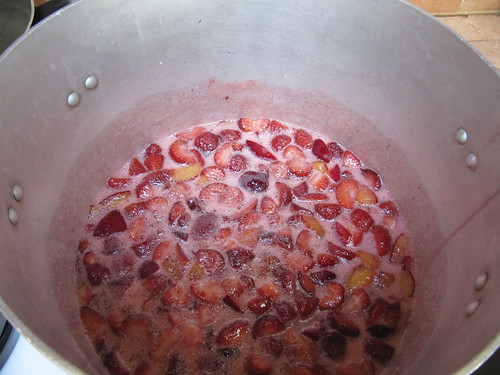
After you weigh the fruit put it in the pan and begin to stew slowly on low heat. You do not need to add any water to the fruit because the liquid will come out of it as it begins to cook. However, if you notice that the fruit is sticking to the bottom of the pan you can add a little bit of water, about a tablespoon or two.
Once the fruit is tender, add the sugar. Use the same weight of sugar as the fruit (so this time I used 3lbs sugar to 3lbs fruit). Pour the sugar over the fruit and begin stirring. Keep stirring until all of the sugar is completely dissolved, otherwise it will crystallize and stick to the bottom and sides of the pan. Softer fruits require the juice of about 1/2 to 1 whole lemon per pound of fruit, to help with setting. I didn't use any because plums set easily.
After the sugar dissolves, turn up the heat and begin to boil rapidly. Rapid boiling is key because if it boils too long it will not set and/or the fruit may burn. Make sure you test early for setting, some jams can be ready after 5 minutes, although I find it usually takes mine about 15-20 minutes.
How to test that the jam has set:
My mother swears by a candy thermometer, but this never works for me. The rule of thumb is that you boil the jam rapidly and by the time the temperature reaches 220-222 degrees Farenheit it is done. Make sure you don't let the candy thermometer touch the bottom of the pan because you will get a false reading.
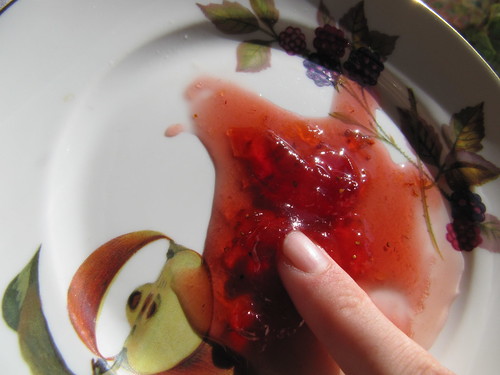
Now, on to my method: Take a little bit of jam and put it on a white saucer. I like a white or light colored saucer because you can examine the color of the jam as well. Allow the jam to become quite cold, and then see if it forms a skin and wrinkles when pushed with your finger. Basically, it should have the thick quality that jam has, and shouldn't be sliding around on the saucer. IMPORTANT: if you think that your jam is ready, take the pan off the heat while you are cooling the jam on the saucer. Otherwise it will keep boiling and will burn or may not set.
Do you see the skin the jam has formed around my finger?
Canning:
Boil up some water, take it off the heat and put it in a bowl, and immerse the lids of the jars in it. This will soften the tacky bit around the edges which will adhere to the jars. Give it about 10 minutes.
While you are waiting for those, begin ladling the jam into the clean jars. Fill the jars until the jam is about 1/8th or 1/4 inch from the top. Be careful as you are filling the jars. Jam is boiling and sticky, not a good combination for your fingers! Make sure you are near a sink so that you can run your hands under cold water if you burn yourself.
Once the jars are filled, put the lids on, and screw the rings around the top. Make sure you don't tighten them ridiculously tight because they will get tighter as they cool.
As the jam is cooling, you will hear little pops as the lids suction onto the jars. A few hours later, after the jam is completely cool, press the tops of all the lids. If they are sucked down, they are sealed. If there is a jar that isn't, and you can hear the lid clicking up and down when you press it, don't worry. Just put the jam in the fridge and make sure you use it right away.
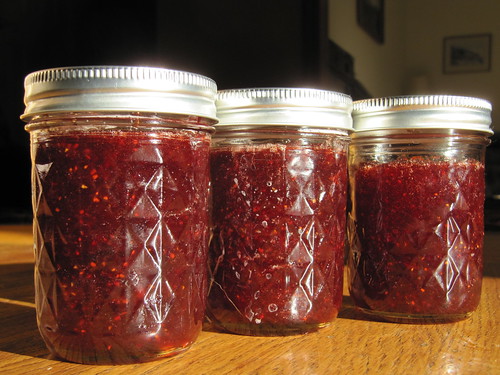
You're finished, hooray! Now you can make pretty labels and give the jam to your friends. Or keep it all to yourself, like Joey!

Let me know if you try it or if you have any questions!
10 comments:
it looks so good!
how strange, i just visited your blog & the jam episode of friends is concidentally on the tv right now!
i would love to make jam but i'm not the most patient cook! maybe i'll have to try it out one day & when i do i'll be sure to follow your advice! :)
thanks so much for visiting my blog & for your comment! the festival i went to was called summer sundae :)
www.messyourhairup.blogspot.com
Ummmm, yummy jam. As soon as I saw your blog title I got the reference to friends, me and my boyfriend sit and watch the repeated ad say the words before they speak (sad I know) xxx
http://my-favourite-fashion.blogspot.com/
wow , can i visit you with a big spoon to dig in those , yum yum ♥
it look so amazing, thanks for sharing the recipe and if don't mess up my mum's kitchen or worse burn it down , will let u know if i successfully made my jam
do u think this recipe work with only pineapple? i love pinapple jam
plus in my country its hard to get peaches and plums
I've always wanted to try making my old jam. Saving this post...
Great post! I love homemade jam my mum always made it when I was younger so much nicer than shop bought!
Oh wow, that looks amazing! There's nothing lovelier than really yummy jam on warm bread or toast (or crumpets or muffins... om nom nom!)
Thanks for your comment as well - I don't think I said it in my post (silly me) but those Peter Pan collared dresses are actually from Miss Selfridge, not Topshop. If you go to missselfridge.com, they're all on there, and from what I can see they do international delivery too, so good news if you wanted to shell out on any of them!
MMM I Have never made jam but I think I might need to soon, that looks delicious
That jam looks delicious!
Post a Comment
Thanks for your thoughts!